
Hi friends! As promised, I’m jumping full swing into the holiday spirit on the blog this week (well, not quite since you got a taster last week with the mini bonus post I did on how I made my Advent wreath – if you didn’t see it, you can check it out HERE! But anyways…).
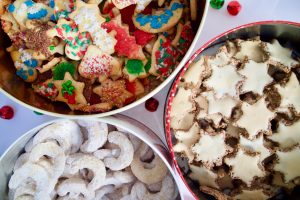
One of the first things we do every year is bake Christmas cookies. We make them every single year, its part of our family traditions. We book off a whole Saturday and mark it in our agendas at least two months in advance. Lol. That’s how seriously we take it. 😉 We make a lot of different kinds – I think we made 9 different cookies this year. We just store them in festive cake tins to enjoy the whole month of December.
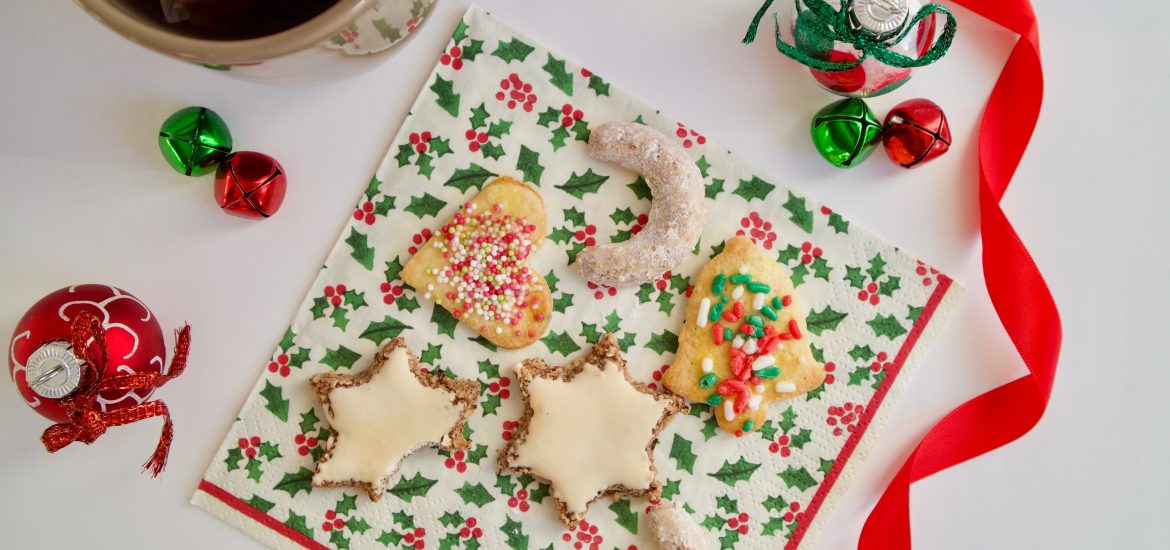
I thought 9 recipes might bore you to death so I thought I would share THREE recipes this year and keep the rest of them for the following years. So you’ll just have to come back next year if you want the other recipes. 😉 Nevertheless, this post is going to be a mile long so I suggest you just skip to the cookies that might interest you. Here’s a little preview of each of the cookies:
#1 The Classic Sugar Cookies
Now, I’m pretty sure you all have a recipe of this classic Christmas cookie but I thought, I might as well share our own family recipe in case you’d like to give them a try. They are the funnest ones to make. We always buy different holiday themed sprinkles each year to make it even more fun. Its a great activity to do with literally anybody.
#2 The Vanilla Crescent Moons
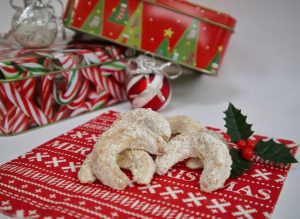
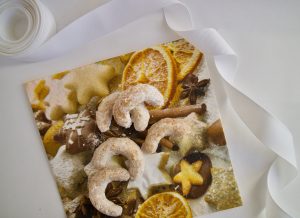
These are probably my favourite ones. Traditionally shaped in the form of crescent moons, they are covered with vanilla sugar and icing sugar as they come out of the oven. This makes them melt in your mouth as you take a bite. What else can I say, you have to try them. They. Are. Amazing.
#3 The Cinnamon & Hazelnut Stars
These are a little different from the classic Christmas cookies as the dough is not made of flour (yes, they are naturally gluten free). They are mainly made of roughly chopped hazelnuts, egg whites and a wonderful sprinkle of cinnamon topped with a little icing. They simply taste amazing. They are a little trickier to get them just right but don’t worry, I’ll give you all the tips and tricks.
I hope this was a promising little introduction to my cookies and have made you want to try them all. 😉
Now let’s get to the recipes…
#1 The Classic Sugar Cookie
For a whole lot of cookies (we double this recipe), you’ll need for the dough:
- 125g of butter, room temperature
- 1 egg
- 75g of sugar
- 250g of self raising flour (if you only have plain flour, add baking powder then)
- 1 pack of vanilla sugar
(you will also need one egg yolk later on in the recipe.)

Prepare your dough the night before by mixing up all the ingredients in a mixer. Do make sure the butter is soft or your mixer will have a really hard time. Don’t hesitate to use your hands to mix the dough. Then just store your dough ball in the fridge over night.
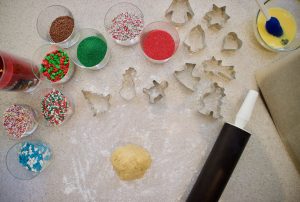
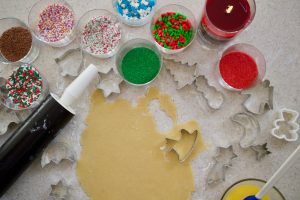
When you’re ready to bake your cookies, start by preheating your oven at 150-175 degrees celsius. Get all your gear out and set up camp somewhere where you can roll out your dough. We got our cookie cutters a looong time ago so I don’t remember where they are from but I found this huuuge set or these really affordable ones. For the sprinkles, I found these ones, these ones or these ones and Waitrose also sells some.
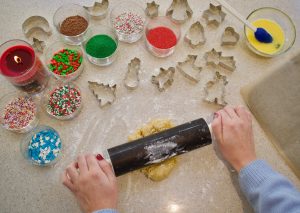
Before you get started, make sure you have your trays ready to go, you’ve put a lot of flour on your surface so the dough doesn’t stick and prepared your egg mixture for your cookies. For the whole batch, one egg yolk with a little bit of water added to the mixture is more than enough.
Now the next few steps are pretty self explanatory so I don’t think I need to go in detail. The only thing I should add is that we don’t use all the dough at once, we cut it in slices and store the rest of it in the fridge in the meantime.

Honestly, the shapes are everything so I highly suggest you get some fun ones!
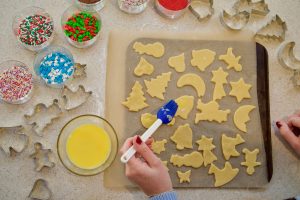
We paint and decorate our cookies before they go in the oven so they stick a lot better since we don’t use any icing. The egg yolk will make your cookies nice and shiny.
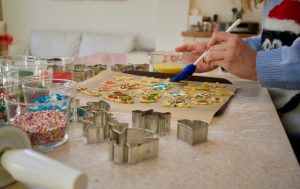
Oh and Christmas sweaters are compulsory!

As you can tell, we put a ton of decoration on our cookies. We’re big fans. Lol.

Once your tray is full and ready to go, pop it in the oven for about 10-15 minutes depending on how thick your dough is. Keep an eye on them, once they become slightly golden, they’re ready to be taken out.
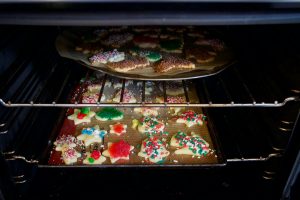
Do let them cool off a little!

^ This cake tin is my all time favourite but I found this set of 3 or this cake tin online, which are super cute!

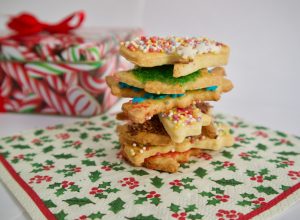
You can enjoy them the whole month of December, they wont go bad, I promise!
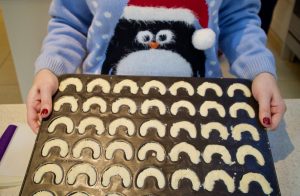
#2 The Vanilla Crescent Moons
Ok, these ones are super easy to make if you have a tray like this one below (you can find it HERE if you don’t have it). But don’t worry, you can still make them with just a regular tray, it’ll just take a little more time. I’ll show you both ways.
For about two trays like the one above, you’ll need for the dough:
- 210g of plain flour
- 150g of butter, room temperature
- 50g of sugar
- 70g of nuts (either almonds or hazelnuts, but should be peeled if you want to achieve this yellow colour)
(You’ll also need icing sugar and a pack of vanilla sugar later on in the recipe.)
Prepare your dough in advance, by mixing up all the ingredients in a mixer. Make sure the butter is soft so its easier to blend. Don’t hesitate to use your hands to mix up the dough. I would suggest making it the night before and store it in the fridge.
When you’re ready to bake, preheat your oven at 160 degrees celsius, get your dough out of the fridge and all your gear ready, i.e. your tray and a cake scraper like THIS ONE (or something similar).
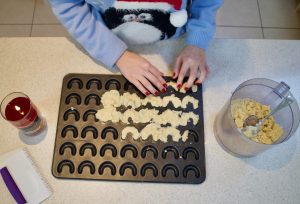
If you have this tray, just fill up each crescent with dough. Don’t worry if they overflow, that’s what the cake scraper is for. If you are just using a normal tray, take a small piece of dough in your hands and roll it out as if you were making a snake and then shape it in the form of a crescent or a croissant. Make sure they aren’t too thin and flimsy so they don’t break when you’ll handle them later on. Hopefully that makes sense.
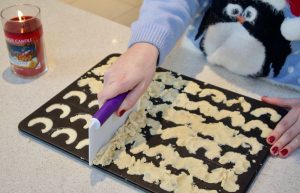
Once you’ve filled out all the crescents on your tray, grab your cake scraper and remove all the excess dough like I’m doing in the picture. You obviously wont have to do that if you’re just rolling the crescent moons with your hands.
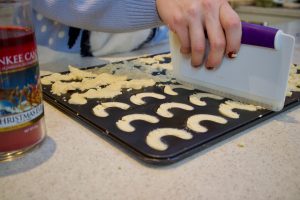
Fill the holes if the scraper took out a little too much. Once you’re happy with your tray, pop it in the oven for 7-10 minutes. You’ll want to be extra careful and not let them get too dark. When they get the slightest hint of golden-ess, take them out of the oven.
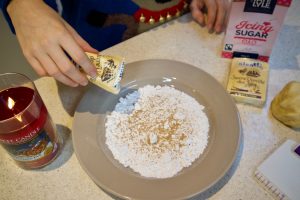
While your cookies are in the oven, grab a large plate, your icing sugar and vanilla sugar. Pour a decent amount of icing sugar onto your plate and add a pack of vanilla sugar. You’ll want to be able to dunk your cookies in the mixture when they come out of the oven.
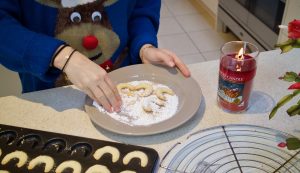
Once your cookies are ready, let them cool off for just about 2 minutes (no more than that, you’ll want to dunk them in the mixture while they are still warm). Then delicately, one by one, place them in the mixture and cover them with the sugar. This is a delicate process, don’t worry if some of them break, its part of the process.
This may sound complicated but trust me, they are worth every bit of work they are. They are my favourite cookies!!
#3 The Cinnamon & Hazelnut Stars
The last recipe I want to share with you today is a little bit of a different one. As I already mentioned, the dough is flourless and so will behave quite differently to the other recipes I’ve mentioned today.
For about 30 cookies, you’ll need for the dough:
- 2 egg whites of large eggs
- 100g of icing sugar
- 350g of hazelnuts, chopped
- 50g of almonds, chopped
- 2 teaspoons of cinnamon
- 1 pack of vanilla sugar
You don’t have to prepare the dough in advance, just make it when you’re ready to bake your cookies. For the dough, first beat the egg whites until stiff, then fold the rest of the ingredients in, gently until evenly mixed. While you’re at it, prepare your icing as well. For the icing, beat one egg white until stiff, then add 100g of icing sugar using a sieve.
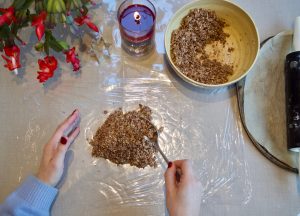
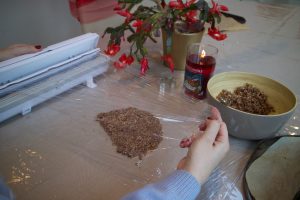
Once you’re done, you’ll realise the dough is quite sticky so I always put a piece of cling film on the surface I’ll be rolling out my dough on. Then scoop out about half of your dough onto the cling film.
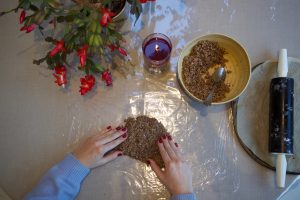
Don’t hesitate to use your fingers to press down on the dough and make it all stick together.
Then, again to avoid the mess of a sticky dough, place another piece of cling film on top of your mixture before rolling it out with your roller. Don’t roll it out too thinly (about 0.5cm thick I would say).
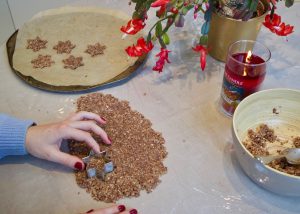
Traditionally, these cookies are always in the shape of a star but of course you could use any other shape. 🙂
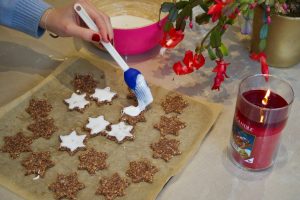
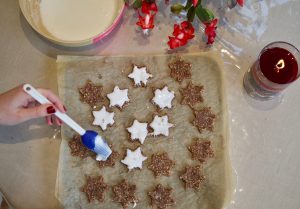
When you’re done, cover them with a thin layer of icing and let them rest for a couple of hours before you put them in the oven (about 2 or 3 hours, if you can). When the time is up, pop them in a preheated oven at 130 degrees celsius for 10-15 minutes depending on how thick your dough is.
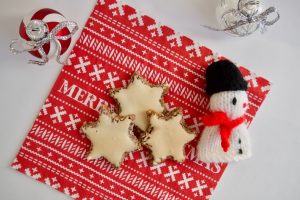
Lastly, let them cool off a little before eating or storing them. Just like the other cookies, they get better as time goes by. You can store them for the whole month, no problem.
I hope you enjoyed this massively long post. Gosh, that took me a while to write. Aha. Let me know if you make these at home! And don’t forget to check out my Instagram page and Pinterest page for more inspiration for the festive season!
Next week, I’ve got a very exciting and special post planned that I cannot wait to share with you…eeeek! Stay tuned… xxx